How to Install Magento 2 Extension - Complete Step-by-Step Guide
Installing a Magento 2 extension is not very complicated if you do it step-by-step according to our guide. After you purchase an extension, you will be able to download the extension file from your account page, and then install it.
This article will help you install your Magento 2 extension smoothly and check whether it works properly.
Download the Extension Package
After your order has been successfully paid, we will send you an email which includes a download link for the extension file.
Or you can directly download the extension package from your customer account like this:
Same as shown in the screenshot below:
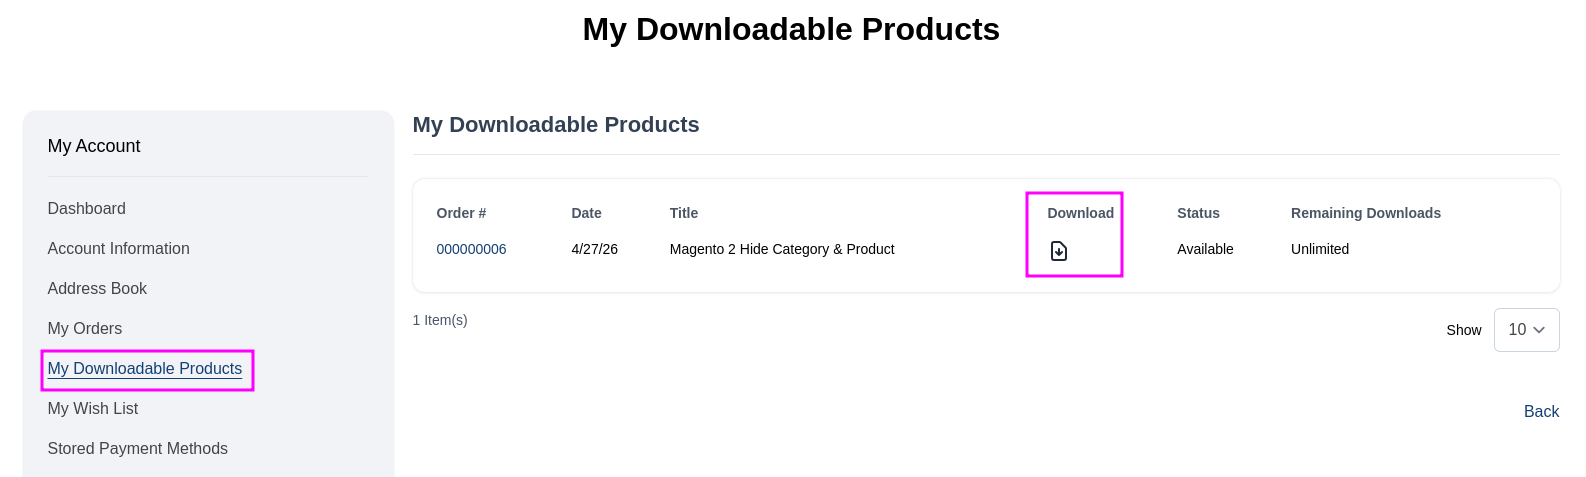
Then you will see the downloaded extension as shown below and you can click on "Download".
After download, you are able to install the extension.
Step 1: Upload the Extension Files
Extract the contents of the downloaded extension ZIP archive to your local machine.
Upload the files using a suitable FTP/SFTP tool like FileZilla or WinSCP into your Magento root folder. Your Magento root directory should contain directories similar to the one listed below:
app
bin
lib
phpserver
pub
vendor
var
generated
Ensure all the files of the extension were correctly integrated into Magento's directories.
Step 2: Run Magento Commands
After uploading the extension files to the Magento server, log into the server via SSH, then navigate to the Magento root directory.
Example:
cd /var/www/html/magento2
Run the following Magento commands one by one:
php bin/magento setup:upgrade

php bin/magento setup:static-content:deploy -f

php bin/magento indexer:reindex

php bin/magento cache:clean

php bin/magento cache:flush
Set the correct permissions:
chmod -R 777 var/ pub/ generated/
These commands will help you:
- Register the extension
- Update Magento database schema
- Deploy static files
- Reindex Magento data
- Clean Magento cache
- Set proper folder permissions
Step 3: Check Installation
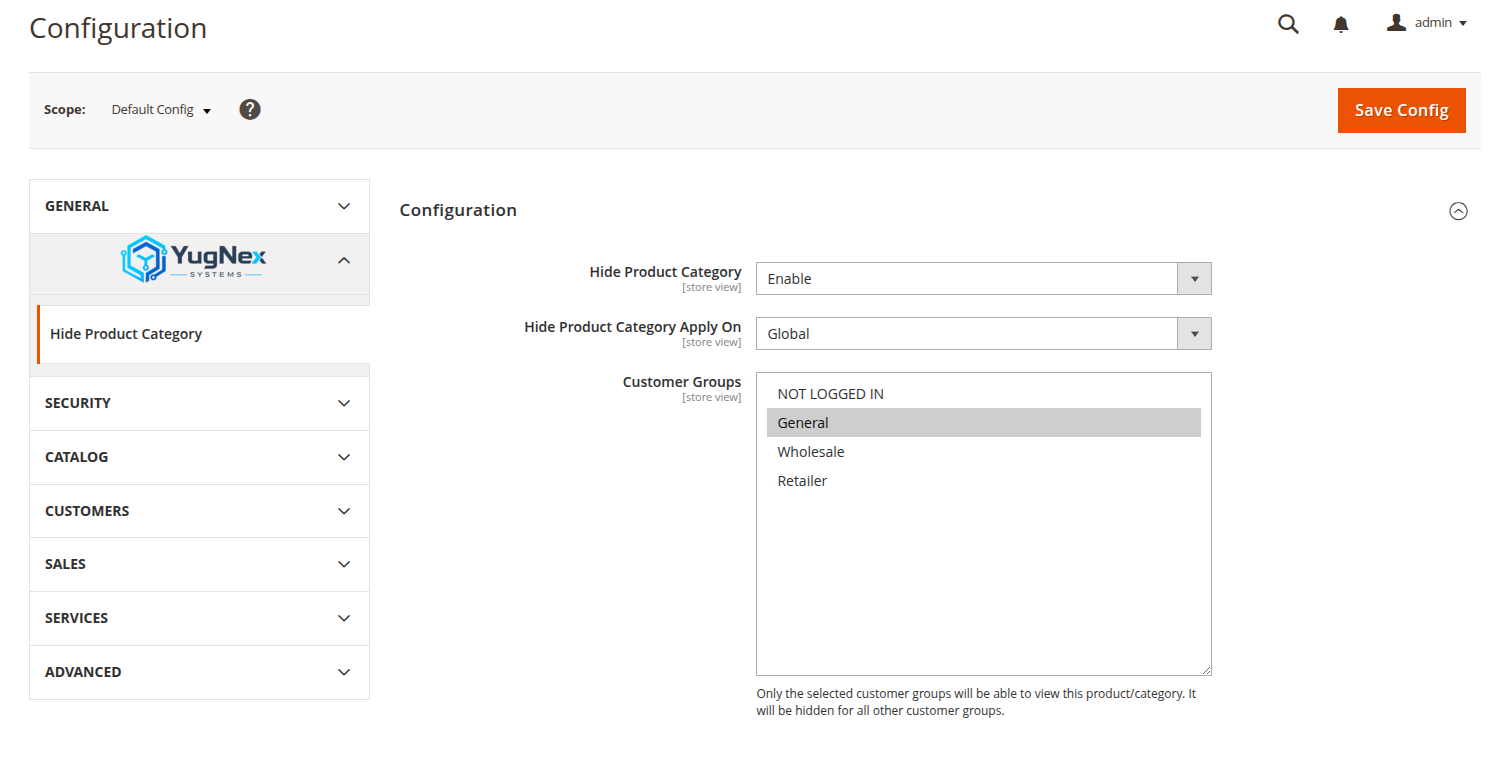
After executing the commands successfully, log in to your Magento Admin Panel.
Navigate to:
The new configuration tab or section with the module's logo/settings will appear in the left sidebar. This confirms that the Magento 2 extension has been installed successfully.
Same as shown in the screenshot below:
Useful Installation Advice
- Always make a full backup of your Magento website and database.
- Use SSH access for faster and more secure installation.
- Enable maintenance mode on production websites before installation.
- Clear browser cache after completing the installation.
Help with Installing the Magento 2 Module
Permission Problems
chmod -R 777 var/ pub/ generated/
Compilation Problems
php bin/magento setup:di:compile
Module Not Showing in Admin Panel
php bin/magento cache:flush
php bin/magento indexer:reindex
Congratulations!
Your Magento 2 module has been installed successfully.
You can now configure the extension settings according to your business requirements and start using its features in your Magento store.
If you need technical assistance, feel free to contact our support team at yugnexsystems@gmail.com